There are many vendors who sells helmet stands. Some stands are even specially made for a specific helmet type. But I live in Norway and most vendors are abroad.
Importing to Norway is expensive. We have to pay for the item + overseas shipping + 10,7 % import tax of the total (item + shipping) + 25 % VAT of the total + a customs clearance fee ).
So let’s say a helmet stand costs $50 and shipping $20 (just examples, not real prices). The import tax, then, would be $7,5 and VAT $17,5. And on top of that, the post office takes about $16 in customs clearance fee. Suddenly, the helmet stand would cost me $111, which is crazy expensive for this type of item.
No, thank you, I want something a bit more affordable! I think I need to make my own.
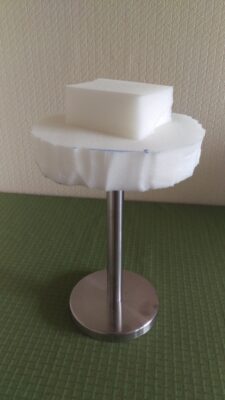
You don’t actually need much to make a helmet stand: A flat base, a rod and some kind of padding. Do you know what has a flat base and a rod? Kitchen paper towel holders! They are readily available in most places, have the height needed for most helmets, and, best of all, they are relatively cheap, priced at $3-10 depending on the material.
You need a solid base with some weight. I recommend that you go for the $10 metal variant. It has the weight needed for the stand to be secure, and that brushed steel base looks awesome for your helmet.
If you go for the $3 option, it is probably made of wood or plastic. It is too light weight, but you can make it work if you add a slab of rubber under the base. This makes the base less slippery, and will also give it some weight.
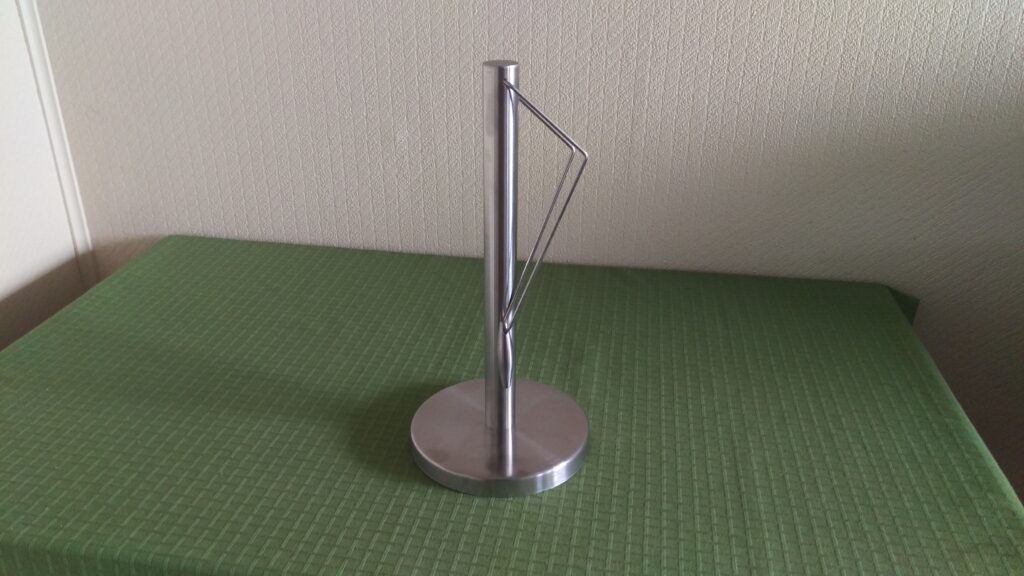
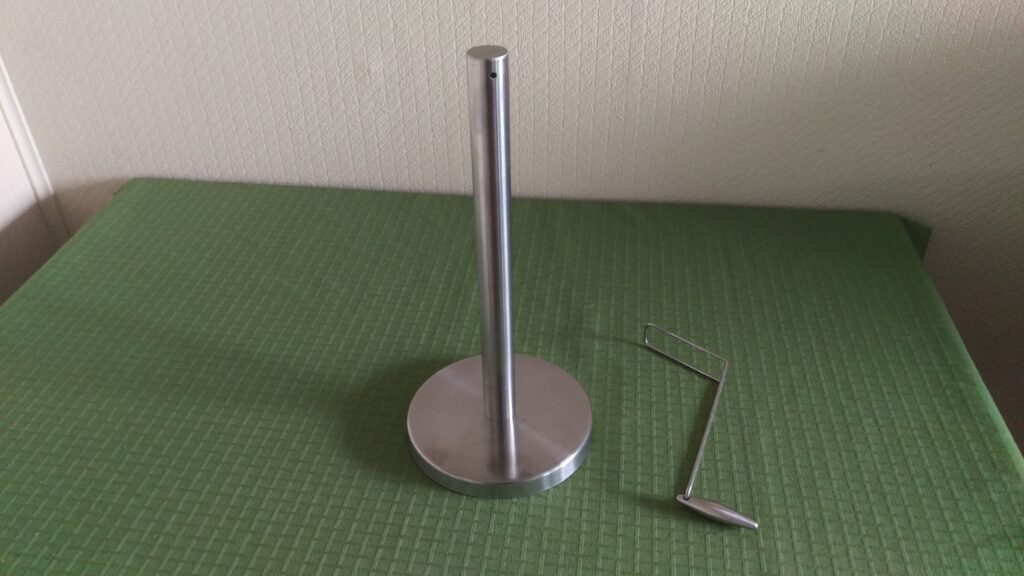
I picked up some metal paper towel holders at the local hardware store. They had these weird metal sticks, which I assume is just a design feature. Luckily they are not welded in place, so I could easily remove them.
I don’t want to just put my helmet onto the rod. That would be very flimsy and the helmet would be in constant danger of falling. I need some padding.
For padding you can use whatever you want – even a paper towel roll! (A paper towel roll? On a paper towel holder?! I know, crazy, but it actually works!) But maybe we want something a little less kitchen-y and more costume-display-y… Something, you know, the size of a head.
Arts and crafts stores often sell styrofoam balls this size, which would work fine. Just poke a hole and stick it on top of the rod.
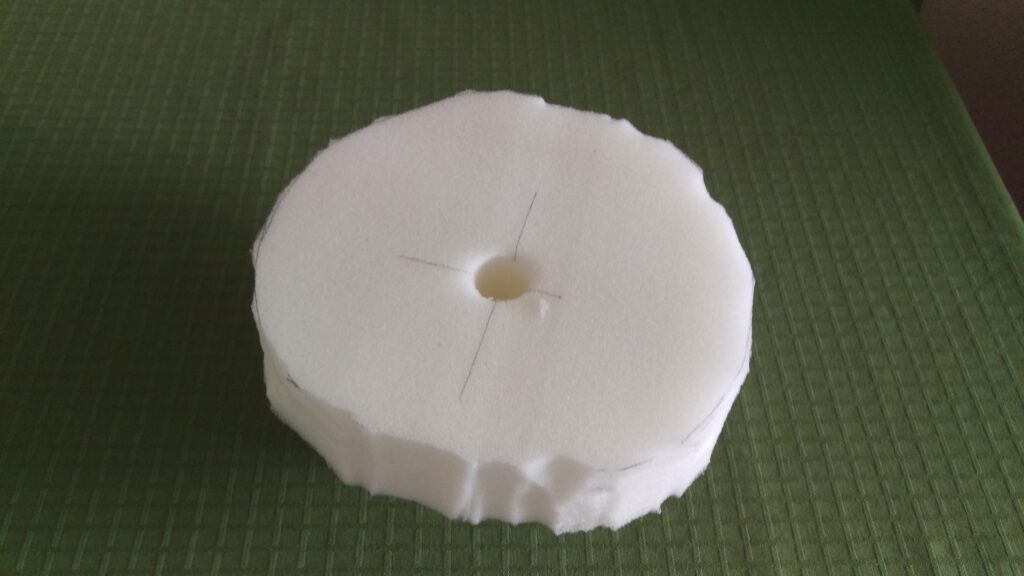
But I couldn’t find any styrofoam balls in town, so I desided to make my own head analogue. It really doesn’t have to be a complete head shape, just some padding that fills out the helmet in the X, Y and Z axis where the thickest part of the head would be. I desided to go for foam rubber, which I have lots of left over from another project.
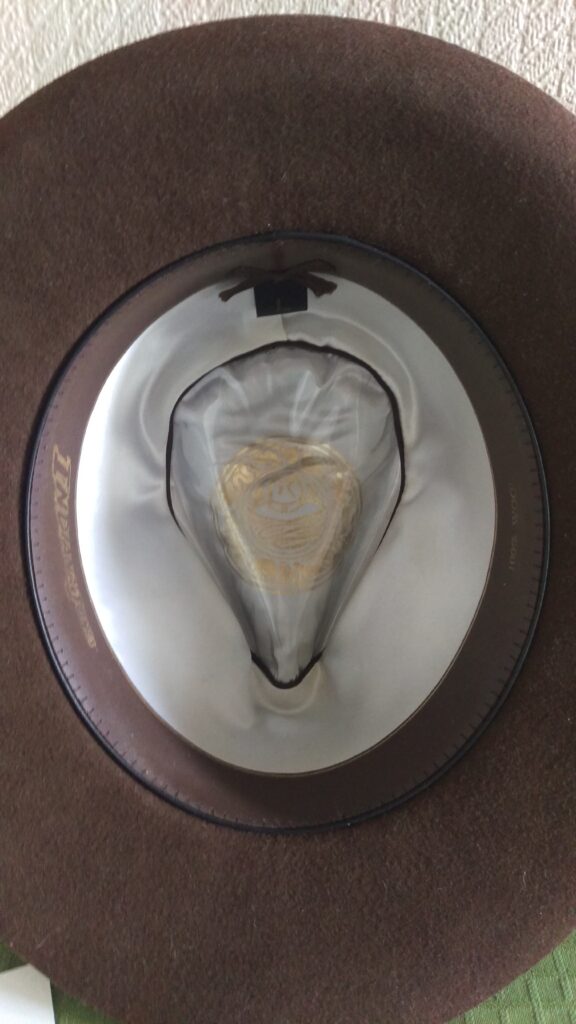
I first tried to measure my head with a tape measure. But I realised that even though I would get the correct circumference, I wouldn’t be able to transfer the shape. I then remembered that both the shape and the circumference is perfectly captured in my Indiana Jones fedora hat, so I just placed a piece of paper on it and traced the opening with a pencil. I then cut the shape and could use it as a stencil on the foam.
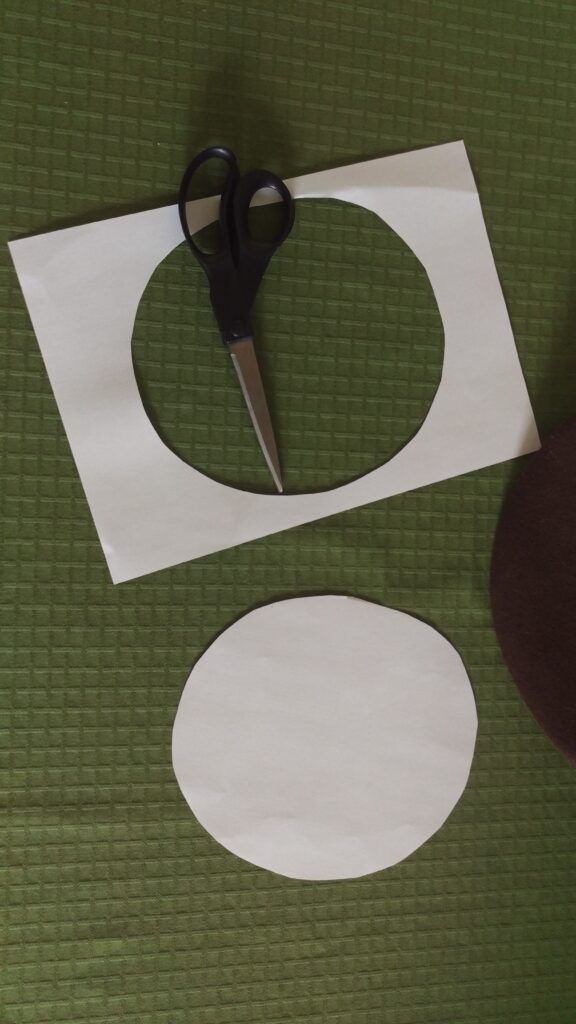
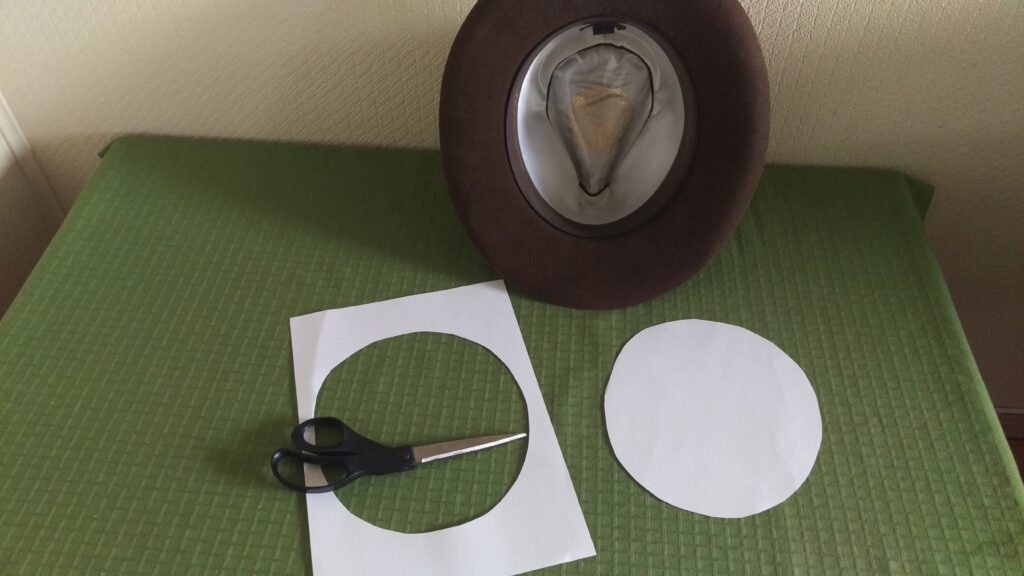
To cut the foam I used a bread knife. It didn’t matter that the edge was a bit jagged and not the exact shape. This is padding, it is not supposed to be seen.
After cutting out a somewhat oval shape, I found the center and poked a hole all the way through using scissors. I then cut a smaller piece of foam, which I glued on top of the hole with hot glue.

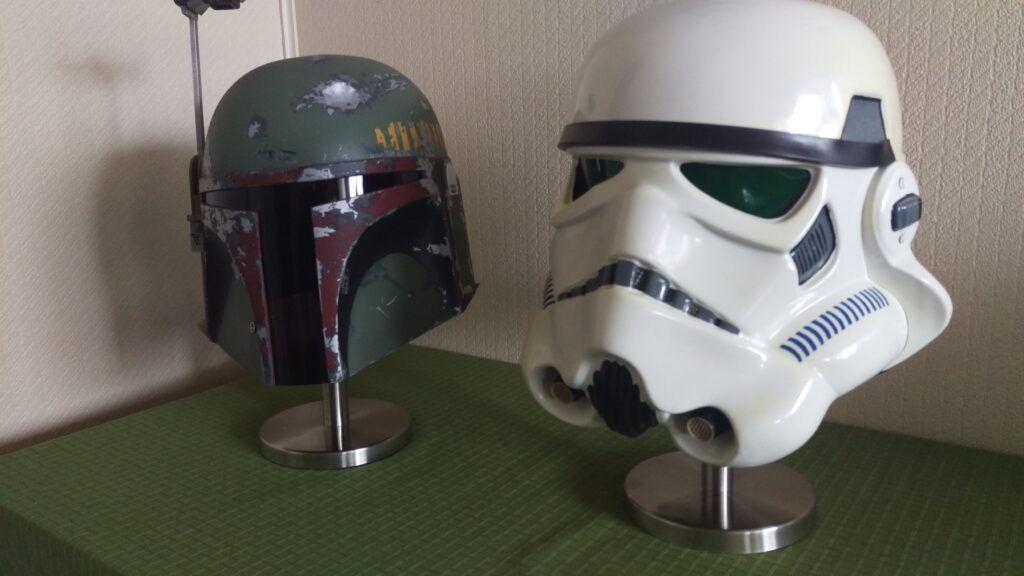
A quick little project. Writing this blog post took longer time than making the helmet stand. It is not a perfect stand, but it does its job admirably.
My stormtrooper helmet has fans and battery packs and what-not inside, so it is very narrow and cramped. I’ll probably trim the foam a bit.
But the Fett helmet fits like a charm.
Tools and materials used:
- Paper towel holder
- Foam rubber
- Paper
- Pencil
- Bread knife (serrated)
- Scissors
- Hot glue