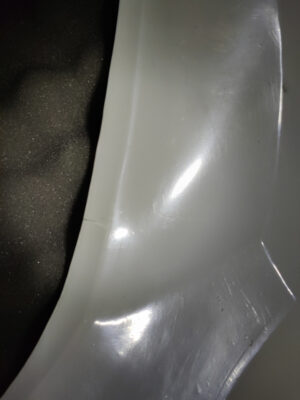
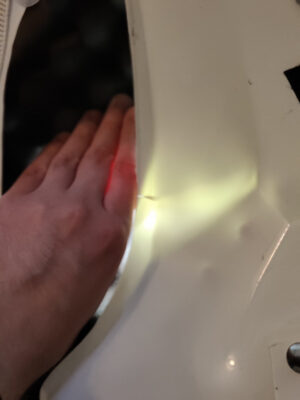
My Stormtrooper armor has started to crack. I’ve been trooping with it since December 2015, so that doesn’t come as a surprise. It is made from 1,5 mm ABS plastic, which is a flexible material that can take a beating, but once a crack forms, you better fix it ASAP.
There’s several ways to fix it. I’ve used the t-shirt and CA glue trick before (cut a piece of cloth, lay it inside the armor behind the crack, add superglue and, voila, homemade “fiberglass” reinforcement), but this time I wanted to try to make ABS paste after speaking with fellow trooper TK 50501 at a recent event about it.
The advantage of using ABS paste is that it welds the crack completely shut instead of just covering and reinforcing it on one side. The paste melts into the armor and becomes a permanent part of it, thus eradicating the crack.
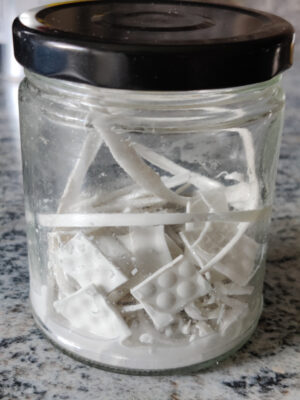
Making ABS paste is actually pretty simple. You’ll need:
- A glass jar with a lid
- ABS plastic in the same color as the armor
- Acetone
- Plastic cutting scissors (or any other tool to cut plastic)
- Wooden stir sticks
Acetone is a strong solvent that will melt ABS plastic. Handle with care. Use proper protection, and only do this project in a well-ventilated area.
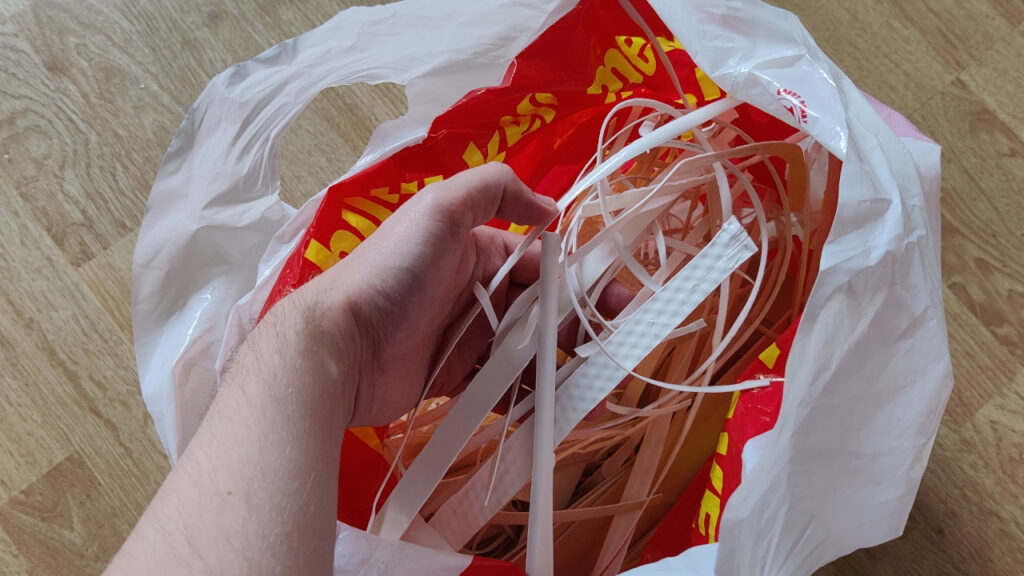
The first thing you need to do is to cut the ABS into small pieces. The shape and size doesn’t really matter, it only need to fit inside the glass jar.
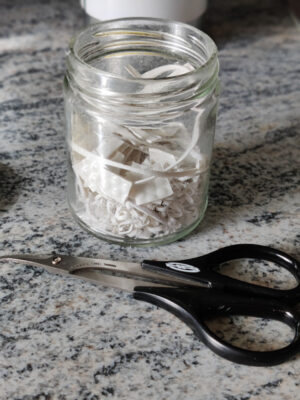
Once you’re happy with the amount of ABS, pour some acetone in the jar. You don’t want too much. Add just enough to cover the bottom by maybe 0,5 cm. You can always add more later.
Close the lid, give it a shake to make sure all of the plastic is soaked, and let it sit for about 30 minutes.
Check and see how it is going. Use a stir stick. The ABS should be soggy by this point. If it’s still hard, add a tiny splash of acetone.
Check in a couple of more times and give it a few stirs. But be patient. This will take several hours.
The consistancy to aim for is firm cream cheese. If it is too runny, add more ABS or let it air out a bit. If it is too firm, add more acetone and let it sit a while longer.
I let mine sit over night.
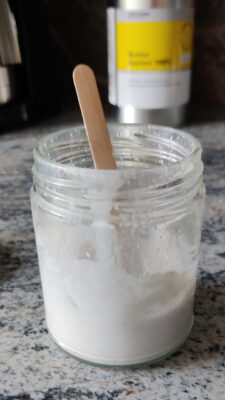
Congratulations, you’ve made your first batch of trooper glue. As long as you keep the lid on, the shelf life should be several months. It will dry out eventually, but you can just add more acetone when that happens.
Time to get fixin’!
I applied the paste on the inside of my armor, behind the various cracks, using a wooden stir stick.
Remember that the paste is still rich in acetone. You want the paste to melt into the armor, not through. If you apply the layer too thick, the acetone will have time to start melting the armor before it evaporates.
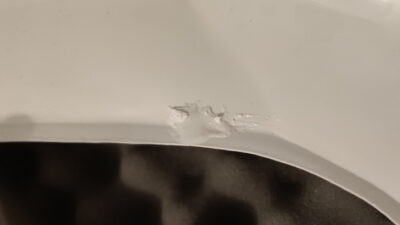
I applied the paste in a couple of layers and letting it dry between the applications.
I had some warping on the outside of the armor by one of the spots, probably because the paste was applied too thick. But that’s fixable with a thin layer of paste on the outside.
When it was completely dry (I give it a day), I used sandpaper to smooth everything out. The spots inside doesn’t have to look pretty, only be smooth enought so nothing pokes my skin, so I used 80 and 120 grit here.
And the one spot on the outside I worked my way up through 120, 240, 600 and 1000 grit, and finished with Novus plastic polish.