The gauntlets looks cool, but they are huge — Popeye the Sailor’s forearm huge! Not only that, but the greeblies make them heavy and changes the center of gravity from the center to the sides. This makes the gauntlets twist upside down. So I needed to make them wearable.
I’ve tested many methods, but decided to go with padding. It wasn’t easy finding affordable foam. The blocks I found at the arts and crafts store were very expensive, and at the hardware store they were soaked in car shampoo.
But I finally found an inexpensive baby crib mattress. A bit too large for this project alone, but I like to keep strips of foam with my trooping emergency kit. These things tend to get lost or worn out, so replenishing the kit was a nice bonus!
I experimented with several configurations. I first tried two blocks, one over and one under my arm. That didn’t work, so I tried with three blocks – two in 45 degree under my arm and one block on top. It did perform better, but still wasn’t perfect. I realised that the most useful configuration would be a circle, so that’s what I tried next. It worked like a charm!
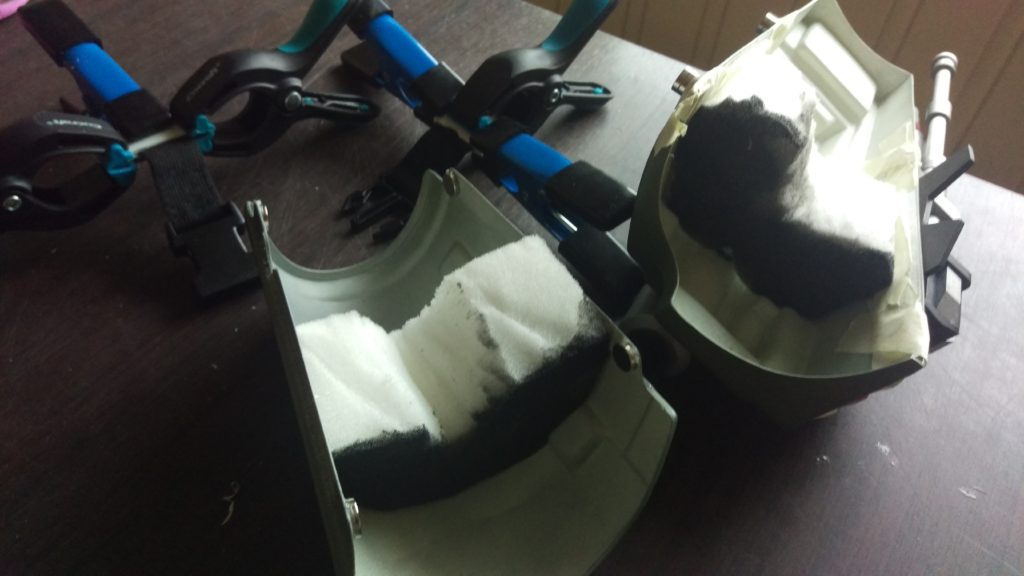
The CRL states that any padding used should not be visible. But the bright white foam padding stuck out like a sore thumb, so I needed to dye them. I used my acrylic weathering mixture from the vest and the flight suit. It’s not stiff or sticky, it doesn’t rub off, and sufficiently darkens the foam so that it isn’t visible anymore.
Next on the todo list were the hose on the right gauntlet. The gauntlet came with a hose, but it was too small. It had a dimension of 9 mm, but the CRL requires 16 mm for basic approval.
I looked everywhere in town for one of these clear-colored hoses. I did find the correct inner diameter and accurate cross-hatch thread pattern, but none had the correct color. The most common colors were green, but I also found black, yellow, orange, blue and even purple. But not clear-colored!
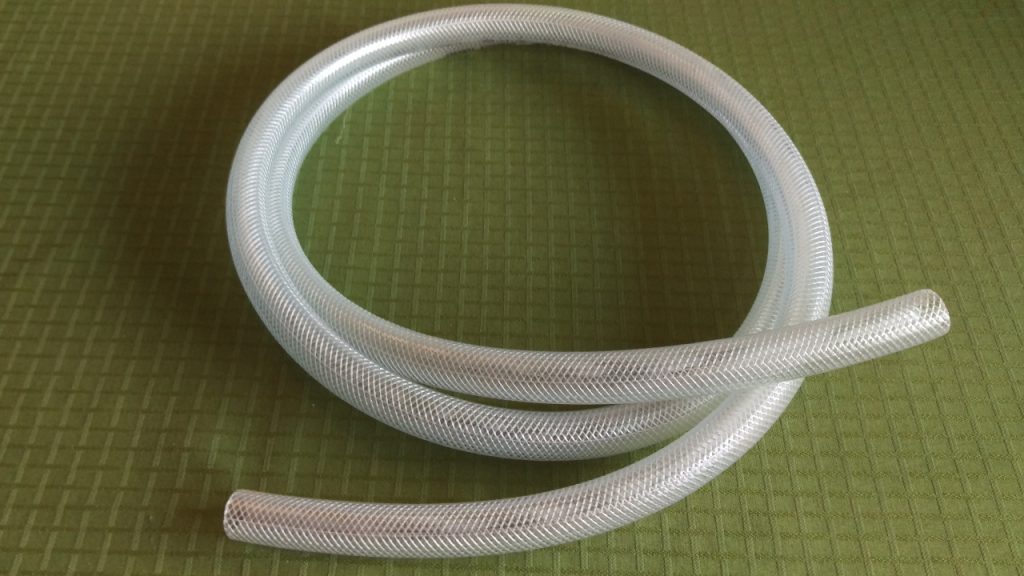
One day I somehow stumbled upon a website selling boating equipment that carried the exact color, pattern and size. So I ordered it a lenght of it. And can you guess what I found the very next day at the hardware store? Well, too late…
To make it look older, I let it sit in coffee for almost 12 hours. I rinsed it off under water and let it air dry. The brown-yellow color is subtle, but you can see a clear difference if you compare it to an un-dyed hose. And it doesn’t look like I’ve painted it, it just looks old. It’s perfect!
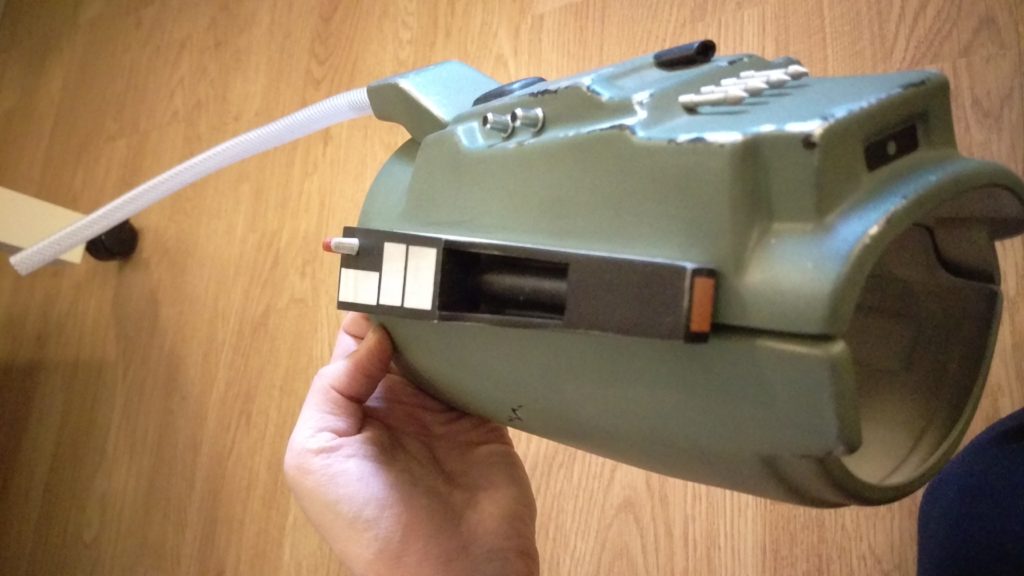
The hose is not connected to the gauntlet. A black power cable (with its plugs cut off) is threaded through the hose and into the hose connector on top of the gauntlet.

A metal rod were embedded in the resin on mine. I had to cut the rod off at the base, and then carefully drill out the rest. I used a metal drill bit and almost no torque on the drill. I even hand drilled at times. I drilled 2 cm into the hose connector.
I squeezed a few drops of superglue (CA) into the hole in the hose connector, and applied superglue to bottom of the cable, about 1 cm. I also applied E6000 glue above that, just enough to reach the top of the hole. That way the cable can’t move in or out, but has some flexibility side to side. I let the gauntlet sit for a few days before touching it, letting the glue dry completely.
I then threaded the hose onto the cable, made a loop of the cable around the strap inside the sleeve of the flight suit, and pushed the loop into the hose. It isn’t 100 % secure, but the cable shouldn’t slip out. The tension from the gauntlet pushes the hose up, giving the cable nowere to go.
Lastly I mixed up some paint – black, brown and some orange – and painted the tips of the two outside darts on top of the right gauntlet.
That’s where we’re at now. I hope this will pass basic approval, but there’s still much left to do. I need to:
- mount a piece of copper to the front of the whipcord housing on the right gauntlet.
- find and install an Ever Ready Minilight inside the right gauntlet.
- find and install Micro Mega endodontic files on the right gauntlet (red and silver) and also on the jetpack (blue).
- replace the resin rocket on the left gauntlet with a metal rocket.
- replace the solid color flame thrower nozzle on the left gauntlet with a clear nozzle. (Since mine is made of resin, I probably need to replace the whole flame thrower.)
They say that you’ll never be done with Fett. I’m starting to understand why.
Tools and material used:
- Hot glue
- CA glue
- E6000 glue
- Foam padding
- Bread knife
- Fruit knife
- Scissors
- Velcro
- Elastics
- Clips
- ABS plastic
- Acrylic paint: black, brown, grey
- Acrylic paint: black, brown, orange
- Clamps
- Magnets
- Painters tape
- Hot water
- Instant coffee
- Rotating tool
- Metal cutting bit
- Drill
- Metal drill bit
- Black power cable
- Wire cutters