A while ago I did some upgrades to my right gauntlet to better meet the CRL standard.
I did film everything, but unfortunately the footage had potato quality. The video was really grainy and most of the audio was unusable. I was about to delete the video files, but desided to trim the video a bit and record a new narration. Here’s the result:
In the video I make a mistake when installing the alcoswitches. I’ve since fixed this mistake.
The 3D printed dental files came in black, so I needed to paint them. To find the correct color, I got several color variants of Humbrol’s enamel paint, painted the tips of some black zipties and left them to dry. When I came back a week later, I compared each one to the reference photos and desides which color matched the best.
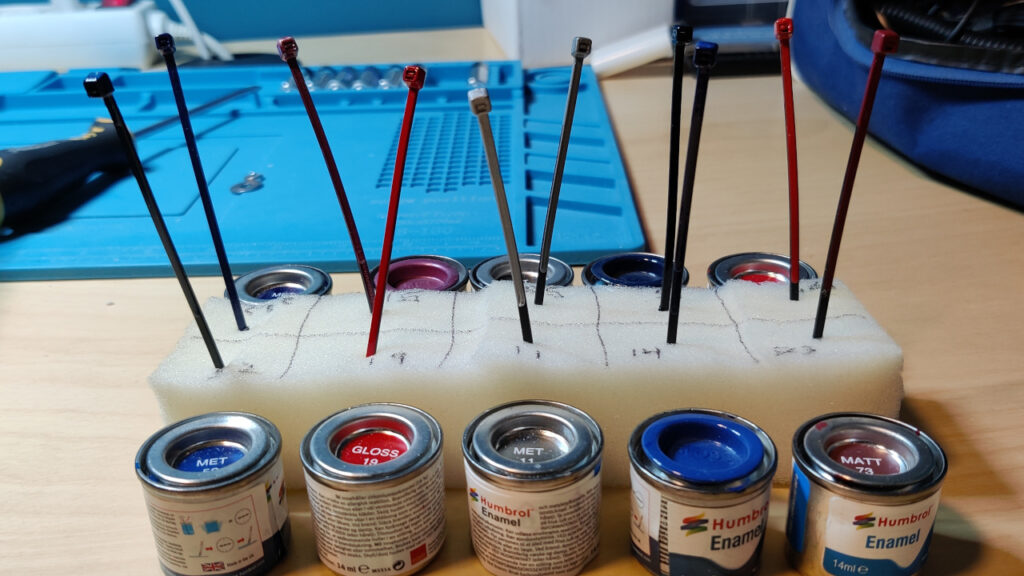
The red and silver is used on the gauntlet. The blue and brownish-red is used on the jetpack.
Tools and material used:
- Hot glue
- E6000 glue
- CA glue
- Sandpaper, 80 and 120 grit
- Files
- Drill
- Drill bit
- Soldering iron
- Solder
- Gaffers tape
- Painters tape
- Isopropyl alcohol
- Velcro
- A single white LED
- Battery pack
- Aluminium foil
- ABS plastic
- Nippers
- Magnets
- Micro Mega dental reamers, 3D printed replicas
- Zipties
- Foam
- Red, blue and silver Humbrol enamel paint
- Black acrylic paint (just a tiny bit, for touch-up around the new dental file)
- Eveready Minilight, 3D printed replica
- Remote for the remote controlled servo motor in the helmet
- Screen-accurate alcoswitches
I’ve used the upgrades for a year and a half now. The servo motor is awesome on paper. I love the idea of it. But the actual gear has been more trouble than it is worth. The wires to the switch is very fragile, and often needs to be re-soldered. The helmet is slippery on the inside, so the motor attachment keeps failing, and any mid-troop quick re-attachment with superglue is always misalligned. And even when everything else is working perfectly, the servo motor itself can suddenly throw a temper tantrum and simply refuse to respond.
On the latest troop the servo worked for approximately two and a half minutes. Given all this trouble, and the fact that it takes up much space and put a lot of weight on one side of the helmet, I desided to remove it and only keep the alcoswitches.
And besides, in the movie and series we always see Mandalorians using their hands to bring the rangefinder down. If they can do it manually, so can I!