One of the most challenging parts of being a stormtrooper, is actually getting dressed. Suiting up can be a hassle. You see, the armor isn’t particularly flexible. And once you start putting on the pieces, it will become increasingly difficult bending down and moving your arms and legs around.
The order of which piece you put on is important. What works best for you depends on what kind of strapping system you use as well as personal preference, but most troopers starts at the bottom.
What you need
- Your armor.
- A table.
- Your emergency trooping kit.
- A bottle of water. Stay hydrated!
- A supporter or a fellow trooper.
- Time: 10-20 minutes
How I do it
1. Undersuit
First I pour myself into a skin-tight compression undersuit. It doesn’t have to be a compression suit as long as it is black, but nylon or lycra is recommended as it helps cool you down. I use a generic brand, black, with no logos or visible seams. It is a two-piece suit, and that makes things a bit easier. Depending on the location and weather, I usually wear it under my regular clothing before going to the troop. This way I save a minute or two, and I don’t have to run around in my underwear in the town hall parking lot…
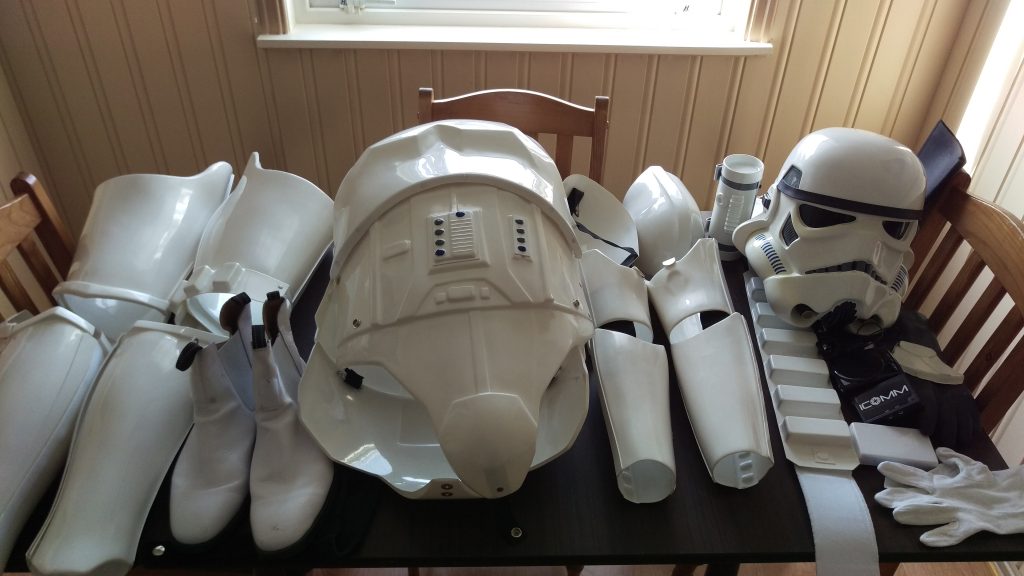
Next I lay everything out on a table. I strongly recommend this. Preferable a tall table. I inspect every item, and make sure everything looks alright. I use my emergency kit to do quick-fixes on-site if neccecary. Stormtroopers believe in the Force that binds the galaxy together — but we call it duct tape!
If anything needs fixing, I make a note to do proper maintainance when I get back home.
If I have a helper who is new to this costume, I will let them inspect the armor with me. I show them how each part connects and explain what I’m going to need help with and what they should look out for. I find that this is will help the helper to better understand the limitations of the costume, and makes them better suited to take care of me while I’m in public.
I then take a sip of water.
2. Thighs
Since my thighs don’t open, I have to put those on now. I snap on the buttons for the garters, but hold off on tighten the belt. I need to be able to bend my knees a while longer.
3. Boots
Next up: the boots. When I first got the footwear, I found it difficult to put them on. But after a few troops they have stretched enough so that my feet finds their way into them without trouble. I can now tighten the garter belt.
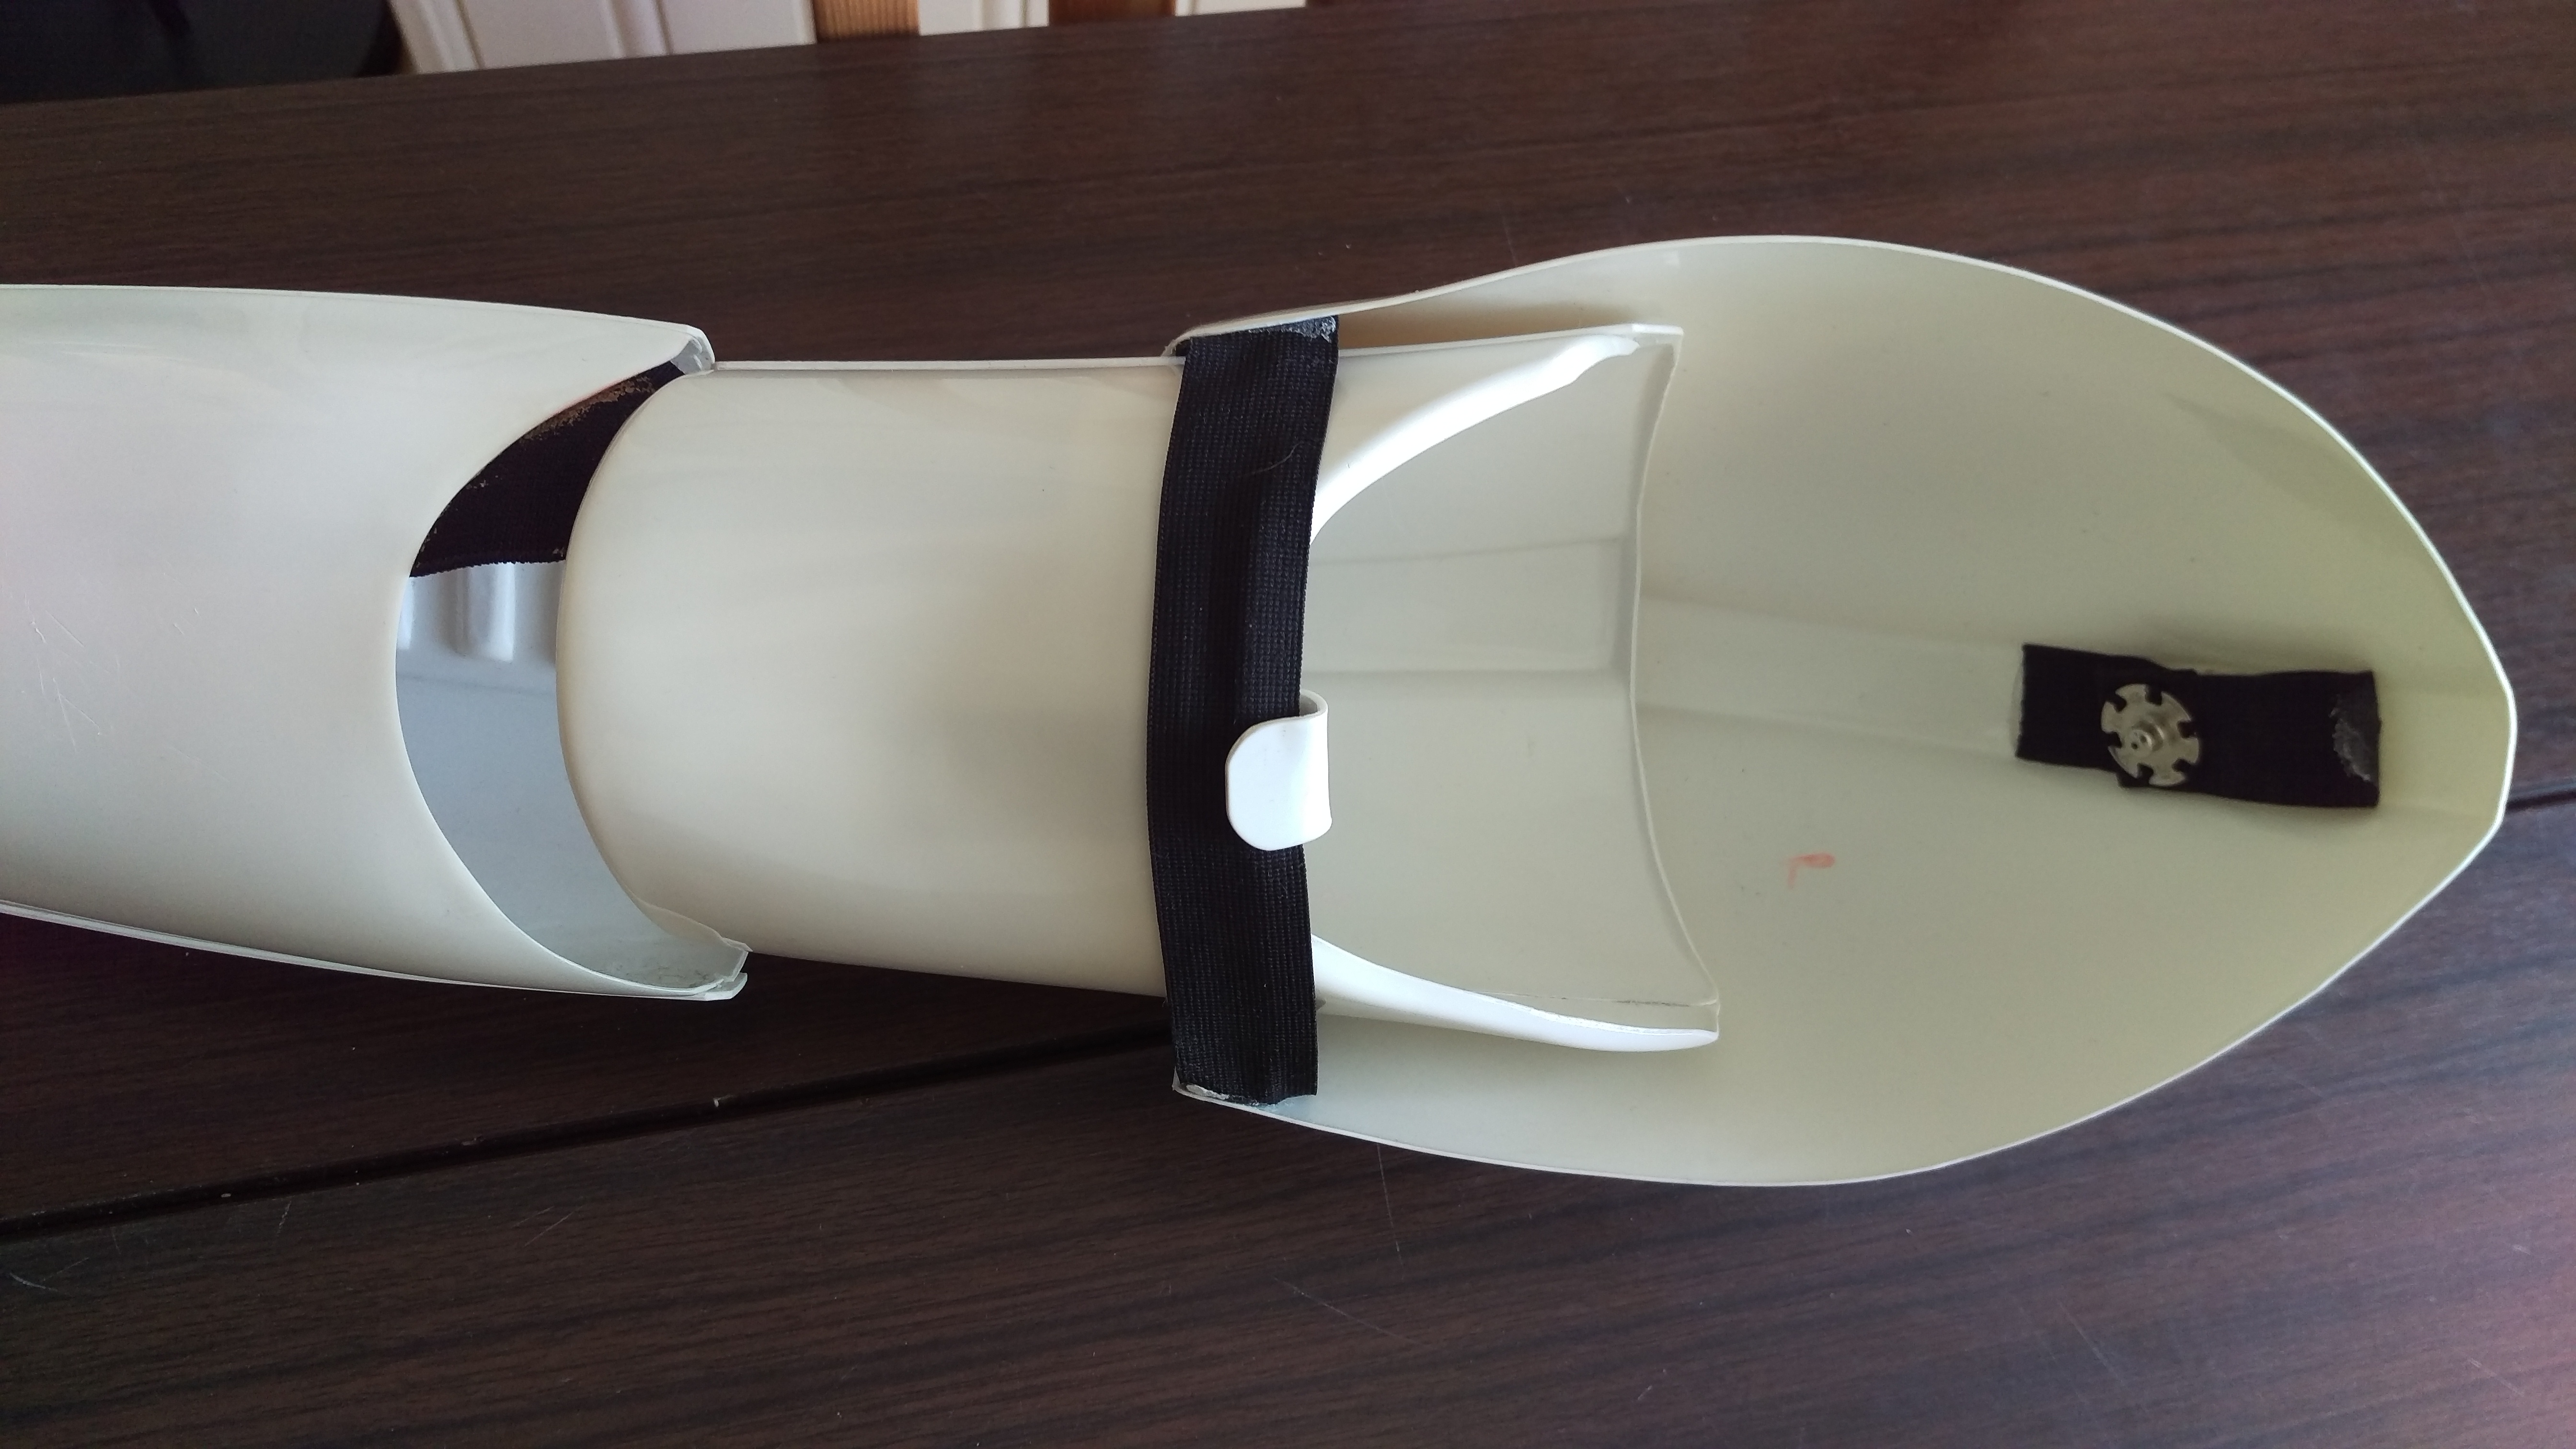
4. Legs
The legs open in the back. I used to have the accurate shin hooks as closure, but they were cumbersome and painful. I now use some good-ol’ velcro. I also have velcro on the front of my boots and inside the leg. When I put the leg on, I aim for this patch, and then do adjustments in the back. This will make a nice, tight fit, and I won’t have any trouble with the leg piece twisting the wrong way or suddenly getting stuck inside the boot.
At this point I can no longer bend my knees. Anything below 25 cm is out of reach for me.
Things are about to get hot, so I take another sip of water.
5. Microphone
If I plan on using my voice box, I tape the microphone to my face. I use masking tape (like painters use) or gaffer tape (like on movie sets). I once tried with duct tape, but it almost ripped my face off after the troop. I prefer my handsome face with skin!
6. Balaclava
I then put on my balaclava. This is not a required costume piece, but it is useful as is serves three functions: 1) It hides my face so that the illusion is not ruined for children and vertically challenged adults peaking up underneath the helmet. 2) It conducts some heat away from my head and helps to cool me down. 3) It keeps the microphone in place if the tape comes loose.
7. Neck seal
Next I put on the neck seal. The one I have now closes with a zipper in the back. I also have one that closes with velcro. Both are like a bib, and I tuck the “skirt” down into my undersuit. The microphone wire does get in the way, but I can live with that.
Incidentally, this is the costume piece I have the most trouble with. I don’t like things around the neck. Scarves, ties, turtleneck sweaters, button-up dress shirts… I can’t stand any of these things. The neck seal and me? Not friends. But on it goes.
8. Voice box
Next, I fasten the voice box and speaker inside my chest armor. I use duct tape, but know some troopers that use velcro. Neither is ideal due to sweat. I want to make some sort of bag or pocket. This way it would protected against moisture, and I don’t have to use half a roll of tape everytime. (Note to self: make chest pocket.) (Also: Buy more tape.) Anyway, I connect the microphone and turn the system on.
«Testing, testing, 1 2 3… The Deathstar plans are not in the main computer…»
9. Torso
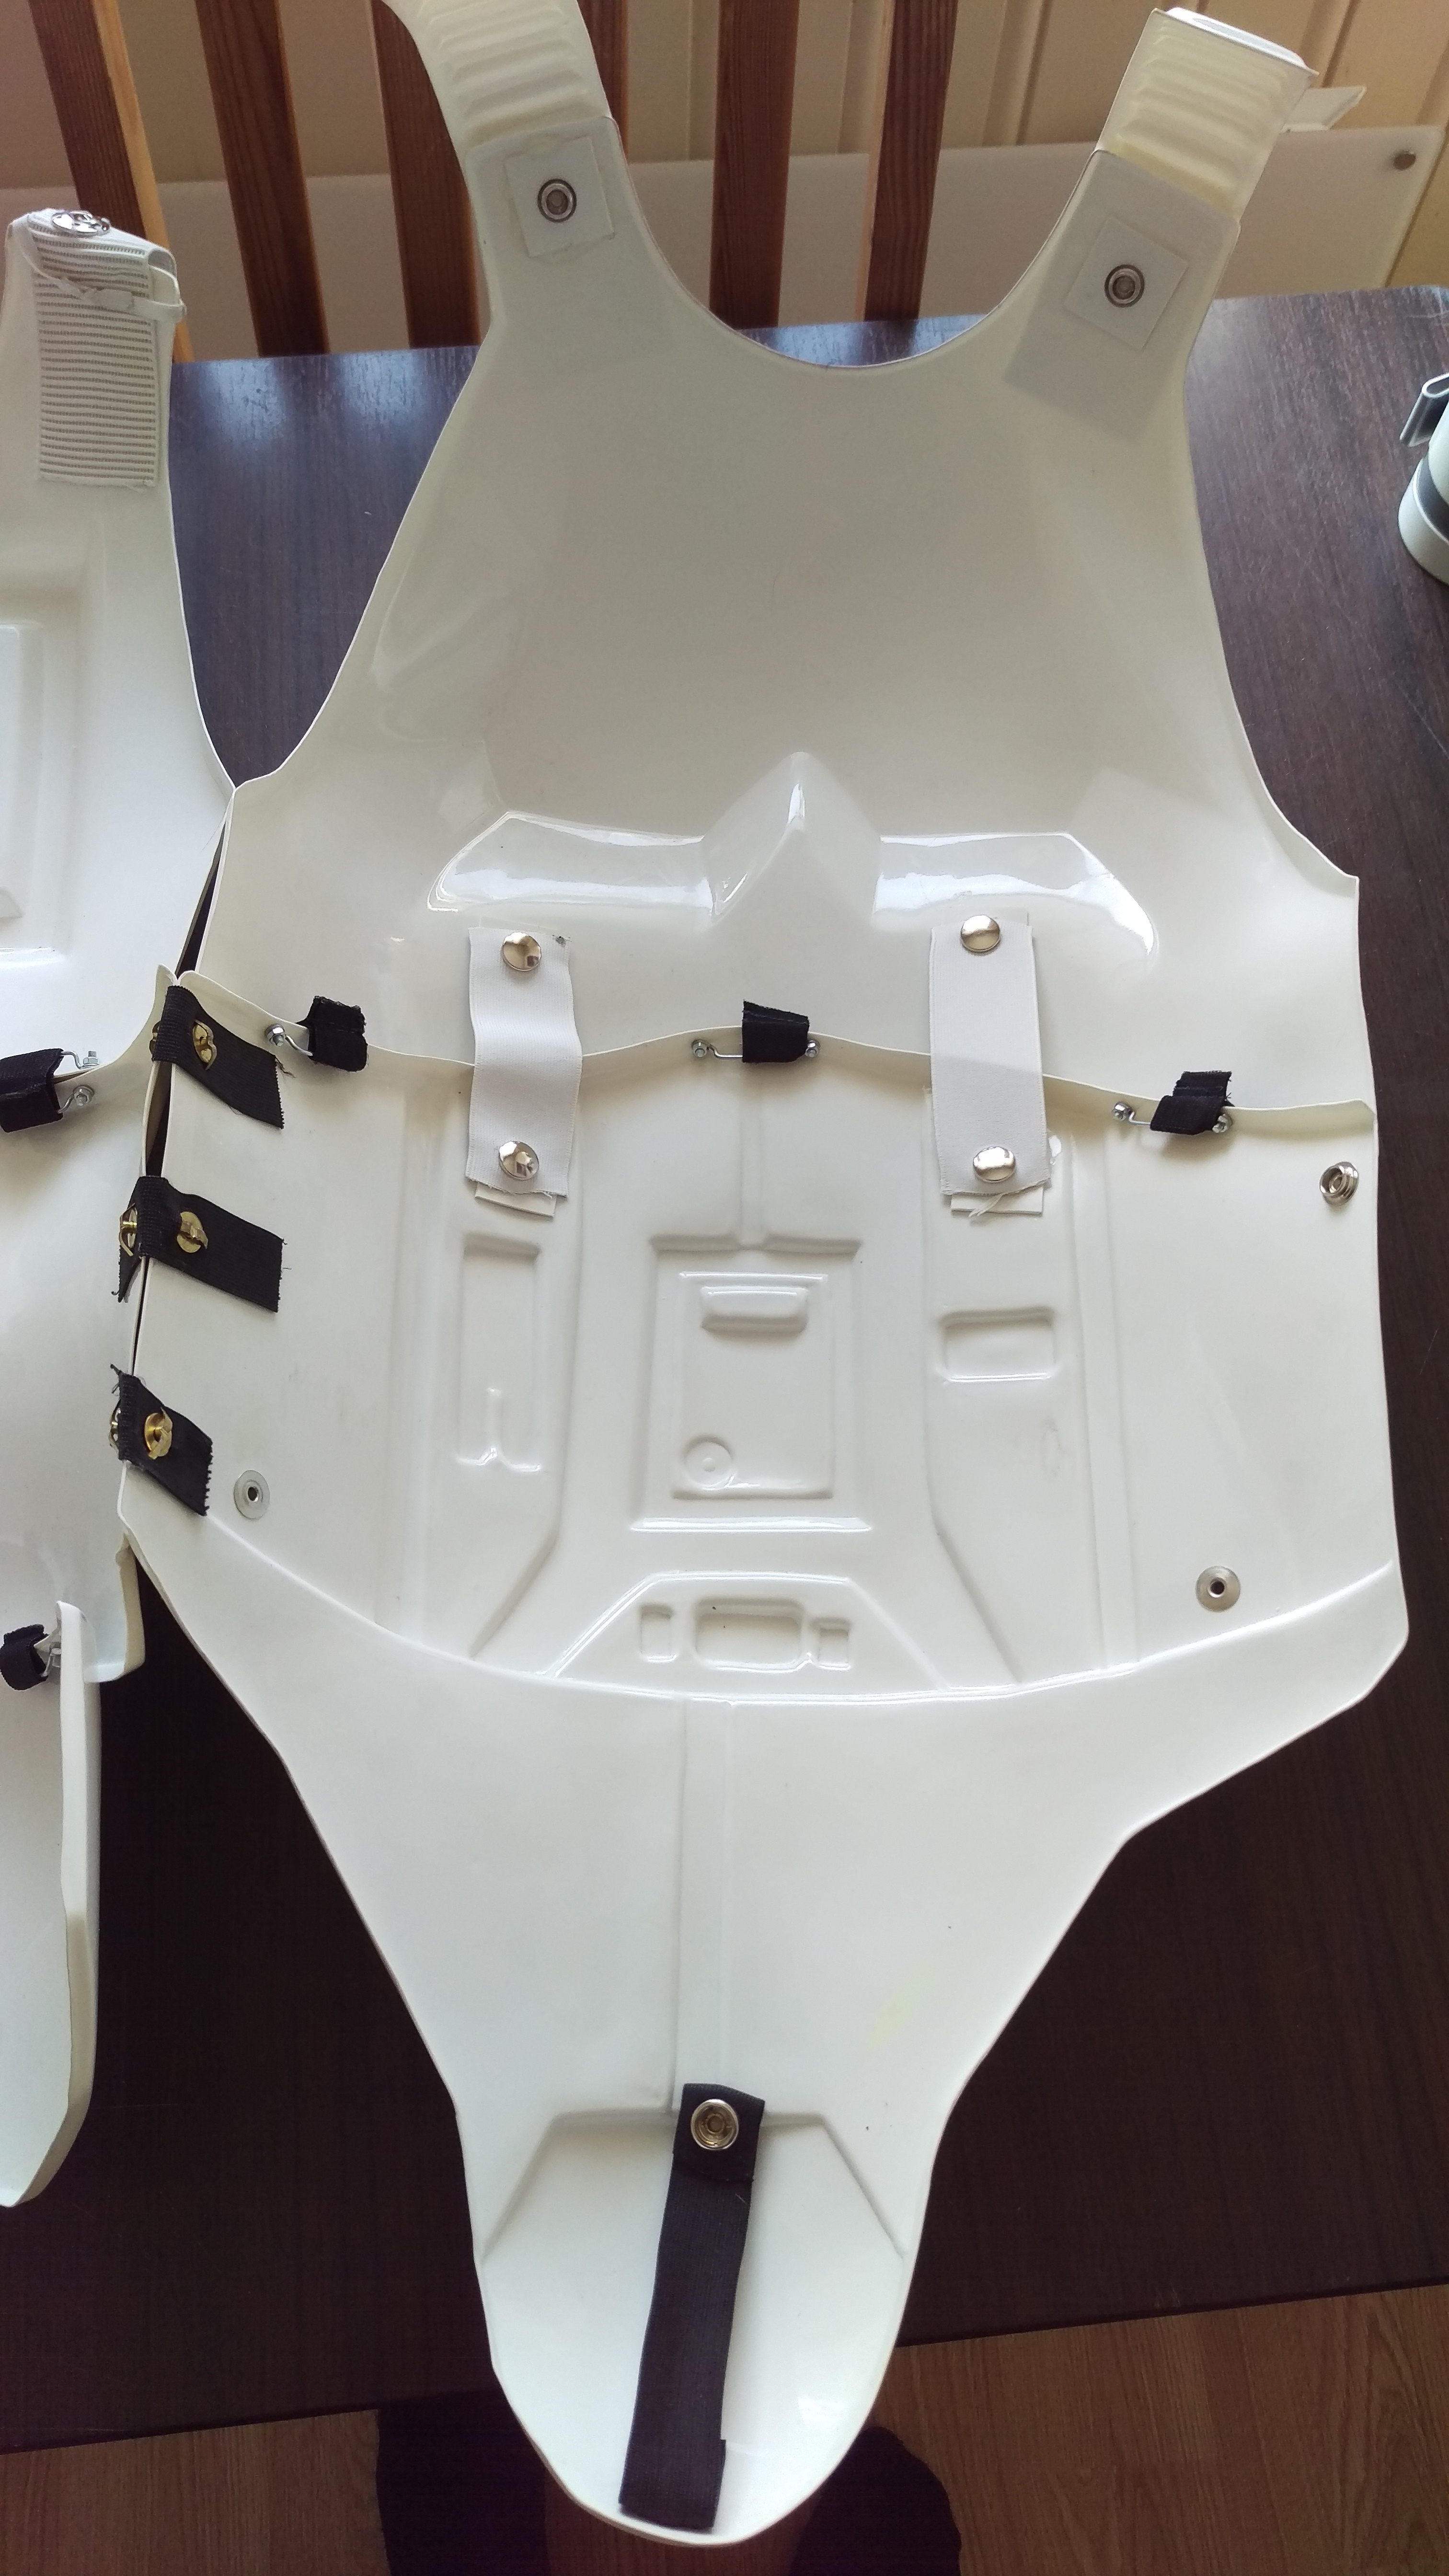
The torso armor have the screen accurate strapping system. The butt, kidney and back is connected top and bottom with six straps and wire brackets, and the cod, abdomen and chest is connected top and bottom with three straps and wire brackets and two straps and snap buttons (the two white straps are not part of the accurate strapping system, but I’ve added them as support). The kidney and abdomen is connected on the left with three straps and split rivets.
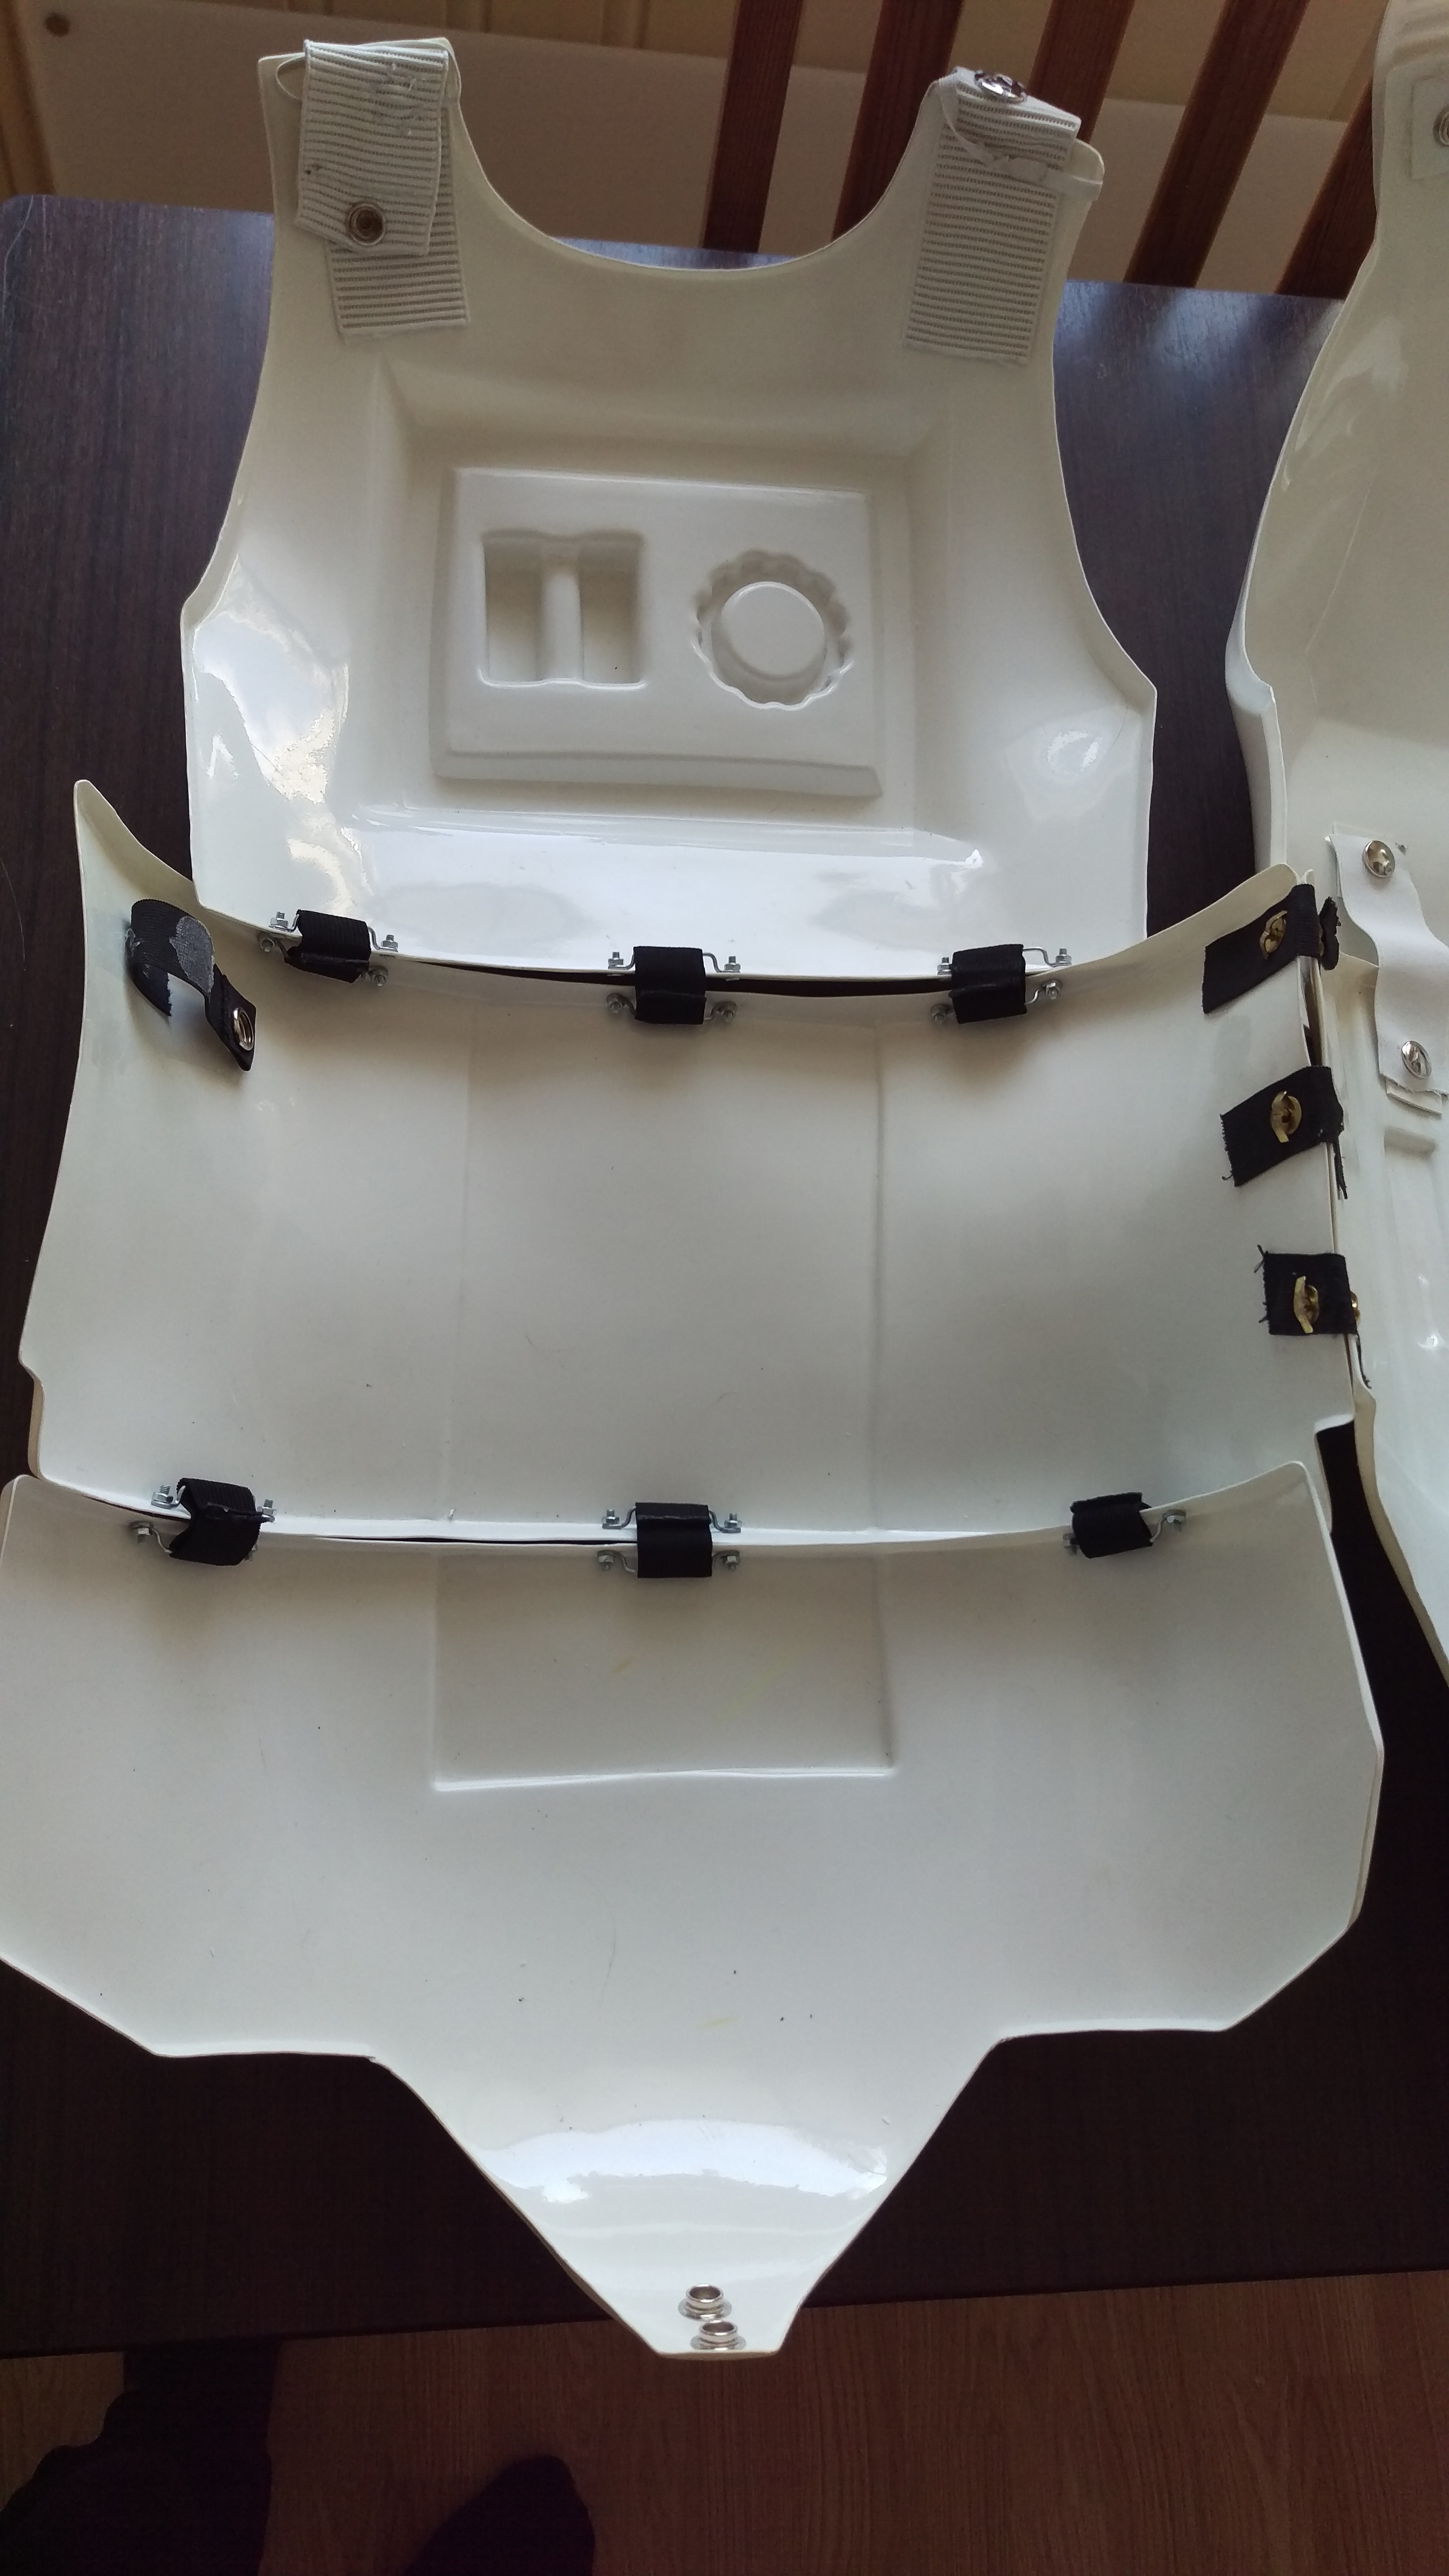
The costume opens and closes at four points with snap buttons. One button connects the butt and crouch, one button connects the top right side of the abdomen and kidney, and two buttons, one on each shoulder, connects the chest and back. The screen accurate armor did only open on the right shoulder. The left shoulder was permanently connected. I chose to open mine up, to make dressing, storing and maintainance easier.
I usually close the butt button first and step into the torso. I then close the abdomen button and the two shoulder buttons. The order doesn’t matter.
10. and 11. Ammo belt and Thermal detonator
The ammo belt is fastened with two snap buttons on left and right front of the abdomen, and velcro around back. The weapon holster is permanently fastened to the belt.
I snap on the buttons, but need a helping hand to tighten the belt. I also need help to place the thermal detonator on the back. It has metal clips, so it just slides onto the ammo belt. This also hides the belt joint.
At this point I can’t bend my upper body anymore. Anything below 50 cm is out of reach for me.
I drink some more water.
12. and 13. Shoulders and Arms
The shoulder bells have a strap with a button that snaps onto the torso shoulder straps. It can be a bit tricky to reach. I can reach it myself, but I usually ask the helper. Once the shoulder bells are snapped in place, I thread my arms inside them. Now it is time to put on the arms. The underarm and bicep are permanently connected with a strap, so I just have to slide them on. On the biceps, right below where my armpits are, there is hook that the shoulder bell strapping slides under. This will keep the arm in place.
At this point I can no longer bend my arms. Hopefully my noes doesn’t start to itch!
Almost done.
14. Helmet fans
If I’m using my helmet fans, I will now connect the battery and turn them on.
15. Gloves
I then put on the gloves. First my white cotton undergloves (not required, but very useful to soak up the sweat) and then the black rubber gloves. I tuck them inside the arm.
At this point I no longer have fine motor skills in my fingers. I can wave, point and make fists, but I’m otherwise useless.
16. Helmet
The only thing left now is the helmet. I used to have a chin strap inside, but it just got in my way so I removed it. The helmet slides on with a twisting motion, like a cork screw.
With the helmet on, I can’t see anything right in front of me. Most people don’t realize how huge this blindspot is. I measured it to be at least four meters. To make things worse, my glasses wont fit inside the helmet. Unless I’m wearing contact lenses, everything will be blurry. But that doesn’t matter, because everything will also be dark green, making depth perception next to impossible. And if I’m not using the helmet fans, the lenses will soon fog up from all the sweat.
At this point I’m mostly blind.
I do a test walk, jumping, shaking, flailing my arms and legs around. If nothing falls off or cracks open, I’m ready. Helper, lead the way!
At this point I’m a Stormtrooper.
To summarize
- Undersuit
- Tighs
- Boots
- Legs
- Microphone
- Balaclava — optional
- Neck seal
- Voice box — optional
- Torso
- Ammo belt — ask for help
- Thermal detonator — ask for help
- Shoulders — ask for help
- Arms
- Helmet fans — optional
- Gloves
- Helmet
… and report for duty!
How to undress
This part is easier since it goes a lot faster. Pull off the gloves and arms. Twist off the helmet, turn off the fans and disconnect the battery. Take out the padding, and pour out or wipe up any sweat. Disconnect the shoulder bells and take them off. Remove the thermal detonator and take off the ammo belt. Snap open all four torso buttons, and remove the torso. Turn off the voice system, and disconnect the microphone. Remove neck seal, balaclava and microphone. Undo the legs, take off the boots and remove the thighs. Drink water. Wipe down all of the parts with a towel before packing them away. Remove undersuit and put on your regular clothes. Drink more water.
Bonus video
Back in 2015, I made an awkward video of the first time I suited up. Please note I’ve made many improvements to both the armor and my technique since then. Here, for your viewing pleasure, is my first time:
(Video is in Norwegian)